- Related articles
- All Cisco CWDM-SFP-1470's information (List price, Specs, Datasheet PDF, Compatibility mat
- What Is Pipeline Fiber Optic Cable?
- The difference between XENPAK and XFP
- Analysis on the performance of common external wireless network card and purchasing skills
- Cisco SMARTnet Total Care Service
- Optical Transceivers for Cisco WS-C2960-48TC-L Switch
- The Things You Need to Know about 10GBASE-CX4 Ethernet Standards
- Optical Transceivers for Cisco WS-C3650-24TD-L Switch
- Applicable to 40GBASE-LX4 Standard Optical Transceiver Models
- The History of Network Interface Card

Deleting Configuration on D-LINK Switch
D-LINK Switches are designed to connect multiple devices on a network. They are used to create virtual Local Area Networks (VLANs) and segment networks for security purposes. Sometimes, it may be necessary to delete the configuration on the D-LINK switch, especially when the switch is being reused or sold.
I. Solution 1:
In this article, we will look at how to delete the configuration on D-LINK switches.
Step 1: Access the D-LINK switch
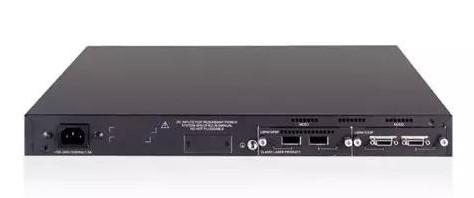
Before you can delete the configuration on the D-LINK switch, you need to access the switch’s web interface. You can do this by using a web browser to connect to the switch’s IP address. The IP address can be found on the sticker at the back of the switch, or it can be obtained from the network administrator.
Once you have the IP address, open a web browser and type the IP address in the address bar. Press enter, and the switch’s login page will be displayed.
Step 2: Login to the D-LINK switch
To login to the D-LINK switch, you need to have the correct username and password. If you do not have the login credentials, you can ask the network administrator or use the default login credentials.
The default username and password for D-LINK switches are usually “admin” and “admin” respectively. However, this may vary depending on the switch model.
Enter the username and password in the fields provided and click on the “Login” button to gain access to the switch’s web interface.
Step 3: Back up the current configuration
Before you delete the configuration on the D-LINK switch, it is important to back up the current configuration. This ensures that you can restore the configuration if anything goes wrong during the deletion process.
To back up the configuration, go to the “Maintenance” tab and click on the “Save & Reload” option. This will display the “Save Configuration” dialog box.
Enter a filename for the configuration backup, and click on the “Save” button. The backup file will be saved in a location on your computer.
Step 4: Delelete the configuration of the D-LINK switch
Once you have backed up the current configuration, you can now proceed to delete the configuration on the D-LINK switch. To do this, go to the “Maintenance” tab and click on the “Factory Defaults” option.
This will display a warning message informing you that all the configuration settings will be erased, and the switch will be restored to its factory default settings.
Click on the “Yes” button to proceed with the configuration deletion process. The switch will restart, and all the configuration settings will be deleted.
Step 5: Restore the default settings
After deleting the configuration on the D-LINK switch, you need to restore the default settings. This ensures that the switch is ready to be used again.
To restore the default settings, go to the “Maintenance” tab, and click on the “Save & Reload” option. This will display the “Save Configuration” dialog box.
Enter a name for the default configuration, and click on the “Save” button. The default configuration will be loaded onto the switch, and it will be ready to use.
Conclusion
Deleting configuration on D-LINK switches is a simple process. However, it is important to back up the current configuration before deleting it. This ensures that you can restore the configuration if something goes wrong during the deletion process.
In summary, to delete the configuration on D-LINK switch, you need to access the switch’s web interface, login to the switch, back up the current configuration, delete the configuration, and restore the default settings. With these simple steps, you can delete the configuration on D-LINK switches and get them ready for reuse or sale.
II. Solution 2:
delete vlan
Purpose To delete a previously configured VLAN on the Switch.
Syntax delete vlan vlan_name 32>
Description The delete vlan command deletes a previously configured VLAN onthe Switch.
Parameters
Restrictions Only administrator-level users can issue this command.
III. Solution 3:
"Dlink Switch Configuration Commands:
1. Connect to the switch using a serial connection through the computer's Com1 port, with a frequency of 9600 (default value) in Telnet mode:
Telnet [switch IP]
2. After entering Telnet mode, input the username and password (default is blank) and press enter twice to enter command mode.
3. Configure VLAN commands:
Create: create vlan [Vname] tag [VID] {1-101}
Delete: config vlan [Vname] delete [Ports]{1-26}
Assign Ports to VLAN: config vlan [Vname] add untagged [Ports]{1-26}
Save: Save
Assign PVID to a port: config gvrp [Ports] pvid [VID]
View Switch PVID: Show gvrp
View Current Switch Settings: Show switch
View VLAN configuration: Show Vlan
Reset the switch to default configuration state: reset system
4. Disable or enable a port:
Enable port 7: config ports 7 state enable
Disable port 7: config ports 7 state disable
5. Configure port mode:
Configure port 7 to auto-negotiation: config ports 7 speed auto
Configure port 7 to 10M half-duplex: config ports 7 speed 10_half
Configure port 7 to 100M half-duplex: config ports 7 speed 100_half
Configure port 7 to 10M full-duplex: config ports 7 speed 10_full
Configure port 7 to 100M full-duplex: config ports 7 speed 100_fu
6. Configure bandwidth limitation:
Limit port 7's sending and receiving speed to 1M, rx_rate being receiving and tx_rate being sending: config bandwidth_control 7 rx_rate 1 tx_rate 1
Remove port 7's bandwidth limitation: config bandwidth_control 7 rx_rate no_limit tx_rate no_limit
7. Create a username and password for the switch:
Create an admin user with the username "admin": create account admin(admin role) admin(username)
Enter a password when prompted
Change the password for the "admin" user: config account admin(username)
Enter the old and new password when prompted
Delete the "admin" user: delete account admin(username)
8. Configure SNMP service:
Create a password for accessing the switch's SNMP service: create snmp community colorme(password) view CommunityView read_only
9. Enable or disable certain services:
Enable web service: enable web
Disable web service: disable web
Enable telnet service: enable telnet
Disable telnet service: disable telnet
10. Modify the switch's default IP address:
Configure the switch's IP address to 192.168.1.242/24 on the default VLAN: config ipif System ipaddress 192.168.1.242/24 vlan default
11. Modify the switch's default gateway:
Create the default route for the switch: create iproute default 192.168.0.1
Dlink Switch Common Commands (Maintenance Manual)"
IV. Solution 4:
"D-link switch VLAN, port, and routing configuration commands
D-link Layer 3/ Layer 2 switches VLAN creation, port assignment, and routing configuration command line configuration example:
1. Create VLAN
DES#Config vlan default delete 1 -24 to delete ports 1-24 included in the default VLAN (default).
DES#Create vlan vlan10 tag 10 to create VLAN named vlan10 and assign VID 10 to it.
2. Assign VLAN ports
DES#Config vlan vlan10 add untag 1-2 to add ports 1-2 to VLAN10 with untag port mode.
DES#Config vlan vlan10 add untag 24 to add port 24 to VLAN10 with tag port mode (e.g., when upstream port needs to pass multiple VLANs).
3. Create VLAN interface IP
DES#Create ipif if10 192.168.1.1/24 VLAN10 state enabled to create a virtual interface if10 for the VLAN subnet named VLAN10, and specify the IP address of this interface as 192.168.1.1/24. Enable the interface using the 'enabled' command after creating it.
4. Configure routing
DES#ip route-static 192.168.2.0 255.255.255.0 192.168.2.1 means to set the next-hop IP for network 192.168.2.0/24 as 192.168.2.1".
The above article explains the VLAN, port, and routing configuration commands for D-link switches from an engineer's perspective.


