


- Related articles
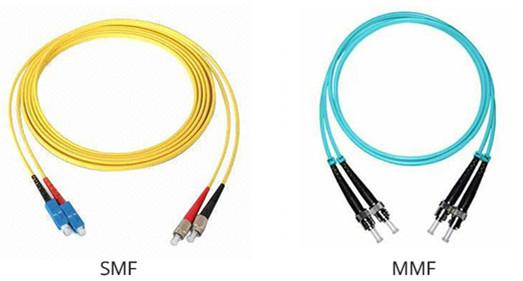
- The Difference between Single Mode Fiber and Multi mode Fiber
- What is media converter in network?
- What is mini GBIC transceiver?
- Optical Transceivers for Cisco WS-C3560G-48PS-E Switch
- What are SFP ports?
- Optical Transceivers for Cisco WS-C3650-48TD-L Switch
- Optical Transceivers for Cisco WS-C3560E-48TD-S Switch
- What is a Laser Diode?
- Applicable to 10GBASE-LW Standard Optical Transceiver Models
- The difference between SFP+ and CSFP


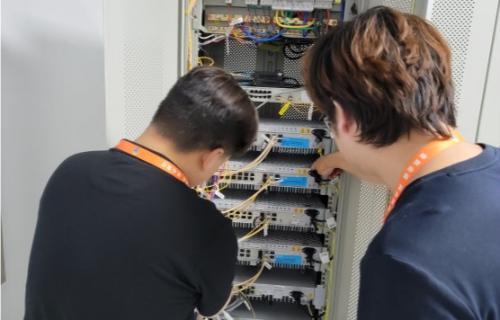
Being proficient in using the fiber splicer is very important for fiber splicing. This article will share the welding operation methods between the optical fibers, leather cables, leather cable, and jumper.
The first step is to know the main parts of the welding machine: keyboard, windshield, heater, fiber fixture, electrode, V-groove, objective lens, mirror, and indenter.
1. Welding splicing between optical fibers
Tools needed: welding machine, cutting knife, Miller clamp, alcohol cotton, fiber, heat shrink tubing.

Steps:
1. Gently press the switch button, turn on the lights light and let go.
2. In the confirmation heat shrink tubing after no dirt, the fiber into the heat shrink tubing.
3. Use Miller clamp stripping fiber coating, length 4cm.

4. Use alcohol cotton to clean the fiber surface 3 times, to the state without attachments.
5. Place the clean fiber into the guide groove of the cutting blade, and the front end of the coating aligns the position between 16mm to 12mm on the graduated scale of the cutting tool.

6. Two fibers carved were placed in the welding machine fixture. Do not touch the end of the fiber and keep the end of the fiber between the electrode bar and the V-groove.

7. Cover the windshield, start welding.
8. Open the windshield, followed by open the left and right fixture plate, remove the fiber.
9. Then move the heat shrink tubing to the weld point and ensure that the ends of the;

10. Put on the heat shrink tubing fiber into the heater, and then cover the heater cover, while heating indicator light, the machine will automatically start heating heat shrink tubing.
11. When the heating light is off, heat shrink is complete. Open the heater cover; remove the fiber, into the cooling tray.
2. Welding splicing between leather cables
Tools needed: welding machine, cutting knife, Miller clamp, alcohol cotton, stripping device, leather cable fiber, heat shrink tubing.

Steps:
1. After confirming that there is no dirt in the heat shrink tubing, put the fiber optic cable into the heat shrink tubing.
2. Use a stripping wire stripping protective layer, length 4cm.

3. Use Miller clamp stripping fiber coating, length 4cm.

4. Use alcohol cotton to clean the fiber surface 3 times, to the state without attachments;
5.Put the clean leather fiber into the cutting knife guide groove, the protective layer of the front end of the cutting knife scale 16mm position;

6. Two leather cable fibers carved were placed in the welding machine fixture. Do not touch the end of the fiber and keep the end of the fiber between the electrode bar and the V-groove.
7. Cover the windshield, start welding.
8. Open the windshield, followed by open the left and right fixture cover, and then remove the leather line fiber.
9. The heat shrinking tubing to the welding point, and to ensure that both ends of the heat shrink tubing wrapped around the fiber optic cable protection layer.

10. Put the leather fiber covered with the heat shrink tubing into the heater, and then cover the heater cover, while the heating indicator lights, the machine will automatically start heating heat-shrink tubing.
11. When the heating light is off, heat shrink is complete. Open the heater cover; remove the lint fiber, into the cooling tray.
3. Welding splicing between jumper and leather cable
Tools needed: welding machine, cutting knife, Miller clamp, alcohol cotton, scissors, jumper, heat shrink tubing.

Steps:
1. After confirming that there is no dirt in the heat shrinking tubing, the fiber optic cable into the heat shrinking tubing.
2. Use a stripping wire stripping fiber optic cable protection layer, length 4cm.

3. Use Miller clamp stripping the fiber coating, length 4cm.

4. Use alcohol cotton to clean the fiber surface 3 times, to the state without attachments.
5. The clean leather fiber into the cutting knife guide groove, the protective layer of the front end of the cutting knife scale 16mm position.

6. Use the front end of the Miller clamp stripping yellow jumper, the length of not less than 5cm.

7. And then cut the Kevlar line with Kevlar scissors.
8. Then Miller clamp back-end small mouth stripping white plastic tube and coating, length 4cm.

9. Use alcohol cotton to clean the fiber surface 3 times, to the state without attachments.
10. Put the clean jumper fiber into the cutting knife guide groove, the protective layer of the front end of the cutting knife scale 16mm position.
11. Respectively put the leather fiber and jumper fiber carved into the welding machine fixture. Do not touch the end of the fiber and keep the end of the fiber between the electrode bar and the V-groove.
12. Cover the windshield, start welding.
13. Open the windshield, then open the left and right fixture cover, and then remove the fiber, the heat shrink tubing to the welding point, and ensure that both ends of the heat shrink tubing wrapped around the fiber optic cable protection layer and jumper plastic tube.

14. Put on the heat shrink tubing fiber into the heater, and then cover the heater cover, while heating indicator light, the machine will automatically start heating heat-shrink tubing.
15. When the heating indicator lights off, heat to complete. Open the heater cover; remove the fiber, into the cooling tray.