- Related articles
- What is the speed of Gigabit Ethernet?
- All Cisco SFP-GE-S's information (List price, Specs, Datasheet PDF, Compatibility matrix)
- Optical Transceivers for Cisco SG500-28P-K9-G5 Switch
- The difference between QSFP+ and X2
- What are SFP ports used for?
- Optical Transceivers for Cisco WS-C2960-48TC-L Switch
- What are SFP ports?
- Optical Transceivers for Cisco WS-C3650-24TD-L Switch
- Difference between XENPAK and GBIC
- Optical Transceivers for Cisco WS-C3560E-12D-E Switch

Fiber optic transceivers are recognized as the most commonly used fiber optic product in fiber optic communication, and they take irreplaceable part in any fiber optic communication or network system. As far as I know, there have been lots of agreements or complaints happened to most of sellers and buyers about fiber optic transceiver failures and most of which were actually caused by incorrect installation or operation. Based on the fact, I believe it’s quite necessary to work out a set of complete guide on fiber optic transceiver installation, no matter a seller or buyer or others you are, this guide expects to help you out of complaining or confusing situation.
Common improper installations and Faults caused
1. Put contaminated fiber optic transceiver into used without cleaning. Fiber optic transceiver failed to work due to blocked ports.
2. Incorrectly removing the fiber patch cable easily causes the ferrule of optical connectors broken inside the optical module, which make it out of use.
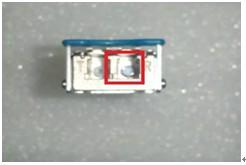
3. Use polluted or inferior fiber patch cable to connect with fiber optic transceiver. This would cause the port of fiber optic transceiver polluted or damaged.
4. Fiber optic transceiver is installed or connected with looseness. On one side, this may result in break happen to fiber optic transceiver when device vibrates or impacts. On the other hand, incomplete installation would limit the optical signal transmission which could cause failure.
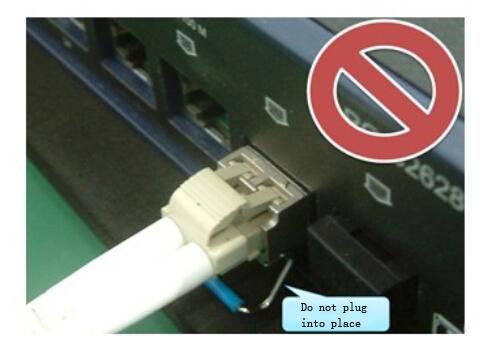
Specific guides for correct installation
Here take SFP optical transceiver as the example.
Careful inspection before installation
1. Check if the metal contacts of fiber optic transceiver are bright and neat.
2. Check if the pull clasp of fiber optic transceiver is workable or damaged. Because the fiber optic transceiver with damaged pull clasp is easily stuck in the device.
3. Check if the whole surface and all the ports of fiber optic transceiver are clean and unblocked.
4. Check the fiber patch cords or cables used to connect with fiber optic transceivers, especially inspect the connectors. If they are polluted or inferior, the performance of fiber optic transceivers would be impacted badly.
How to correctly install SFP optical transceiver step by step?
1. Wear a new pair of antistatic gloves at first. This is effective to prevent static damage.
2. Get the SFP optical transceiver placed in the correct direction, pull clasp and label upwards, metal contacts downwards. Keep this in mind.
3. Slightly slide the optical transceiver into the SFP slot of the switch along the rails of the slot until it tightly connects with the slot bottom and ensure the optical transceiver has no space to move or disconnect.
4. Remove the anti-dust plug from the transceiver.
5. Observe the indicator light of SFP optical module to ensure it works, and confirm the fiber optic module start up.
Note: Do not remove the anti-dust plug from the transceiver slot if you are not installing the transceiver at this time. The anti-dust plug protects the line card and the fiber optic port from dust and other contaminations. It should not be removed until you are ready to connect the fiber optic cable.
How to correctly remove SFP optical transceiver step by step?
1. Likewise, wear a new pair of antistatic gloves at first. This is effective to prevent static damage.
2. Open the lock clasp of SFP optical module. Hold the pull clasp and parallelly, slowly pull out the optical module.
3. Cover the SFP optical port with anti-dust cap to protect the optical port from damage due to long-term exposure.
Note: do not directly watch the two fiber holes of SFP optical module when it is working, because the light from laser would hurt the eyes.
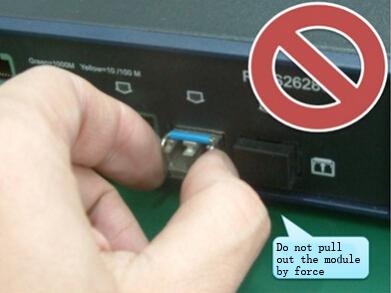
Things need to pay attention when installing fiber optic transceivers:
1. Do not remove the external cover of fiber optic transceiver. Because the external cover could protect you from the laser radiation. If remove the external cover, there is no part inside the transceiver to offer this protection. The best way is to use control button or program to adjust the performance of fiber optic transceiver for avoiding laser radiation.
2. If you installed SFP fiber optic transceiver under the condition of having electricity, the switch button must stay in the half-open status so that you can touch the SFP module link part.
Conclusion
The process of installing optic modules is the one of the most important steps that closely relate to the performance of working, so the operation should be done carefully and with good knowledge concerned, which means for buyers it may make you free of breakdown or save you more time instead of complaining to the seller. More than the installation, the quality and source of itself are also the basis of good performance and pleasant experiences, which means there will be less complaints from buyers for sellers.


